Creating a More Secure Zoom Meeting
Due to recent concerns regarding security and privacy using Zoom to host synchronous classes, here is a quick guide to the 10 best settings to ensure you are doing everything you can to create a safe space for you and your students. This list aims at striking the best balance between privacy, security, and classroom management.
Please note that this guide does not address ways to encrypt data or ensure privacy outside of what is currently offered within Zoom.
The number one suggestion is to use the Waiting Room feature. When enabled, participants will be placed in a “waiting room” that is outside of the meeting space. The host can then admit participants into the meeting. Once in a meeting, the host can send participants back to the waiting room or remove them from the meeting altogether. This can protect against “zoombombing” and other types of unauthorized access because it gives the host real time control over who enters the meetings (which is not the case with only password protection). This also allows the hosts the ability to remove participants who become disruptive. Once all of the participants are in the meeting, the host also has the ability to “lock” the meeting so that no one else can join.
It is also important to note that not all “attacks” originate from outside of the classroom. For this reason, some of these recommendations focus on preventing participant-to-participant issues. It is up to the individual instructor to choose how best to design classroom interactions.
Here is the list with the official Zoom Documentation Guides. In the order of most important. Below we provide an MSU specific walkthrough.
Contents
Enable Waiting RoomsRequire Meeting Passwords
Keep Your Personal Meeting ID Private
Allow Authenticated Participants Only
Mute Participants Upon Entry Default
Disable Participant Screen Sharing
Disable Participant-to-Participant Chat (Or Disable the Chat Altogether)
Disable File Transfer
Hide Telephone Numbers
Enable Virtual Backgrounds
Change Default Settings
- Login to the MSU Zoom web interface
- On the menu options on the left hand side, click Account Profile.
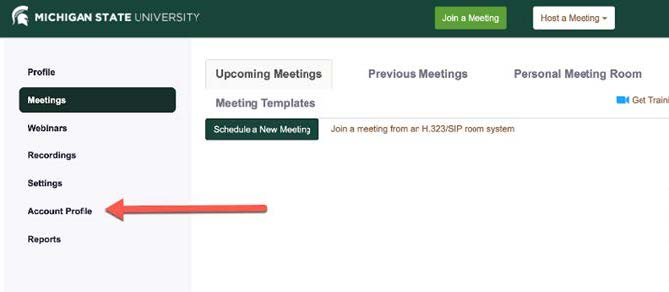
- Scroll down to ensure the top 10 features are correctly enabled.
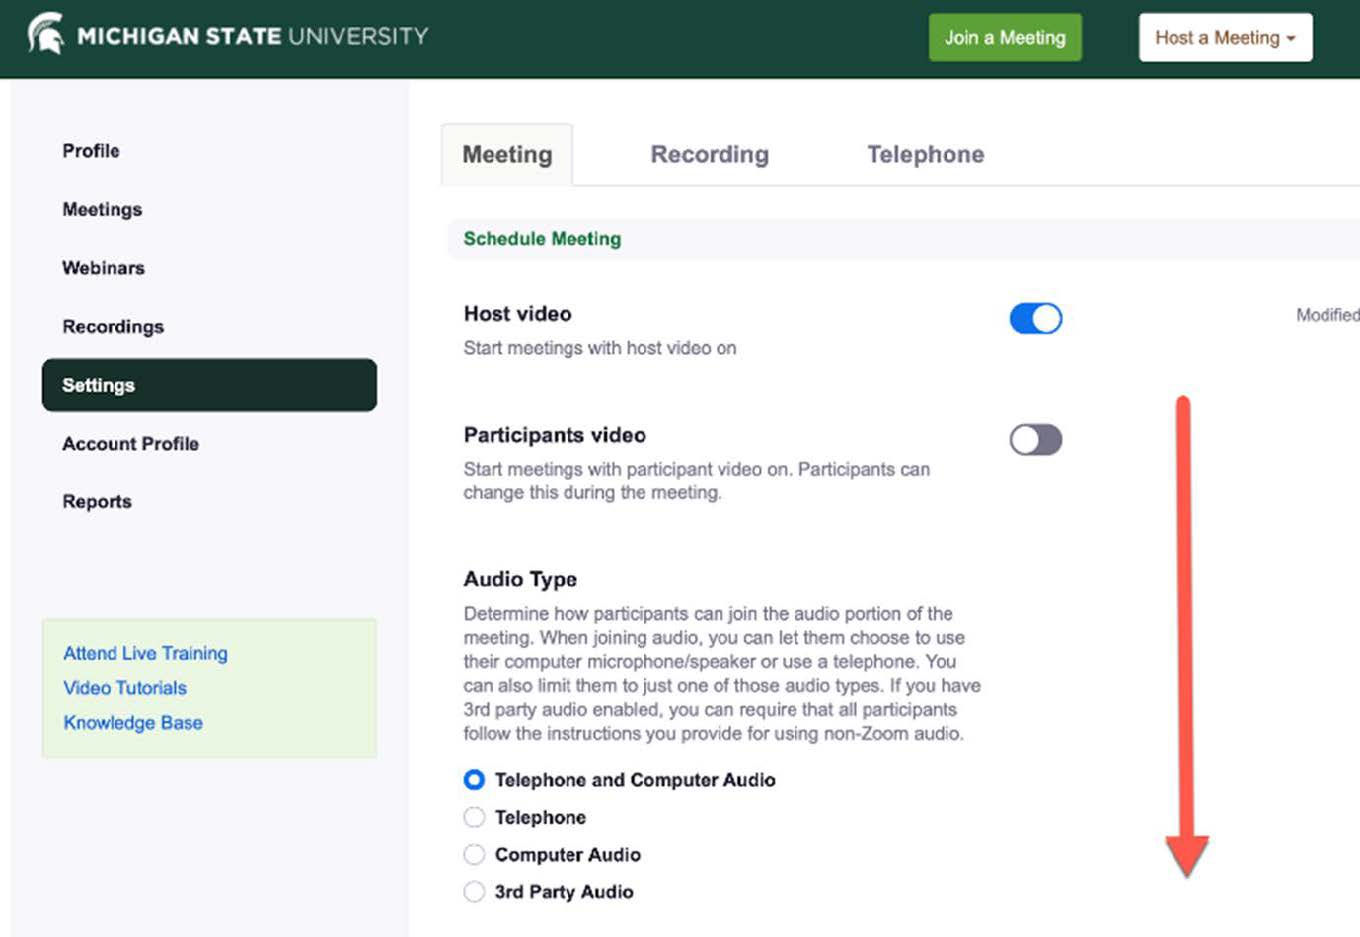
Enable a Waiting Room
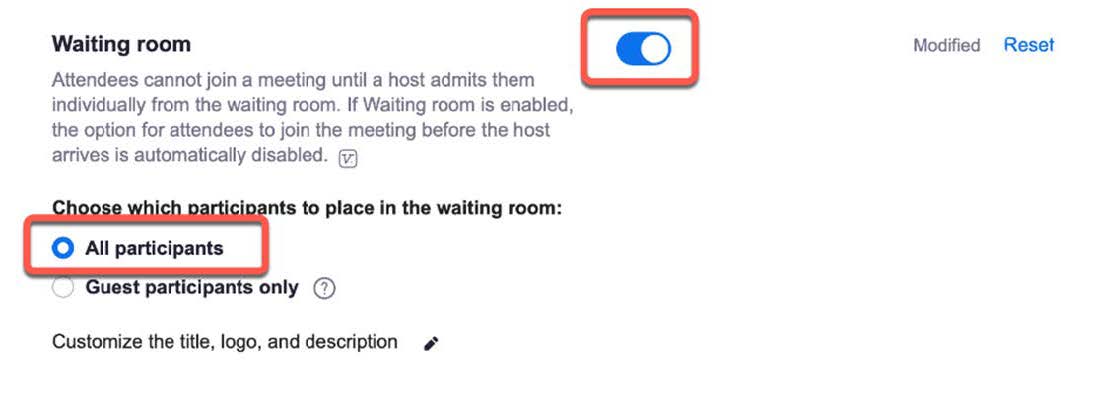
- Enable the waiting room feature by clicking on the button on the right.
- Make sure that All Participants is selected.
- When you start a new meeting users that login will arrive at the waiting room. They must be admitted into the meeting in order to be able to participate.
Admitting and Removing Participants
- Start your meeting.
- Click Manage Participants.
- Here you will see a list of participants that are in the waiting room. Click Admit to allow the participant access to the meeting.
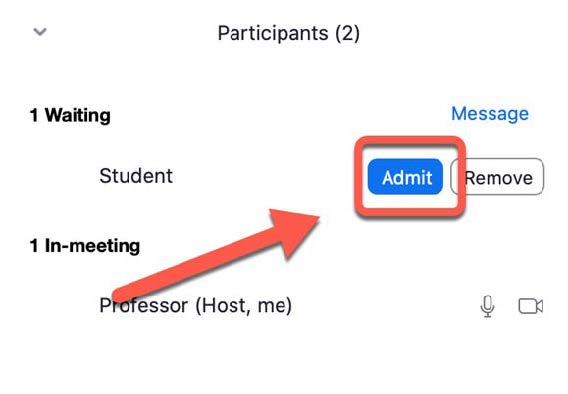
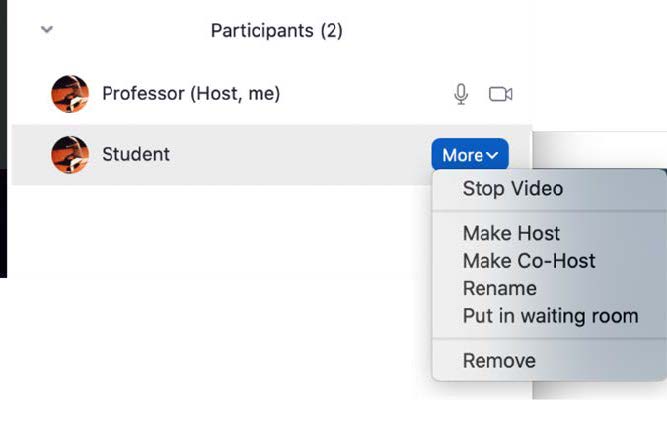
- At any time during the meeting, you can click on the more button next to a participant’s name to send them back to the waiting room or remove them from the meeting. This is also available by clicking on the thumbnail of a participant’s window.
Require a Password
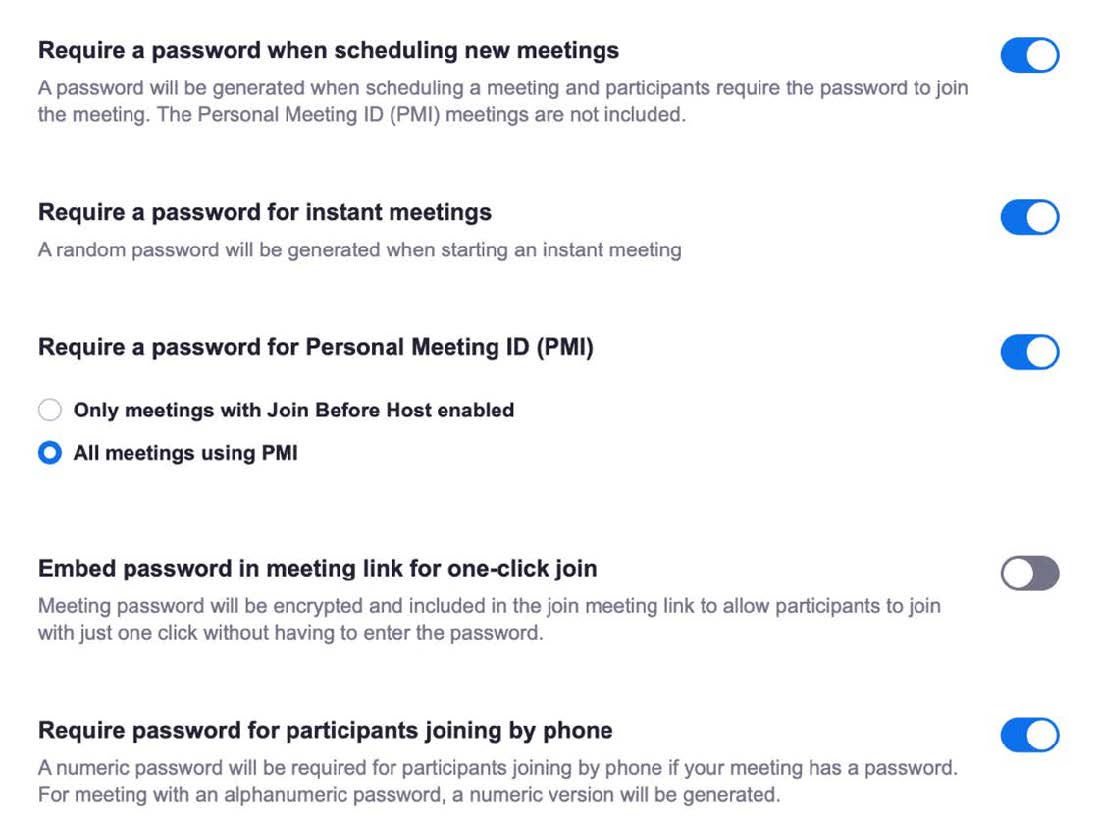
- Passwords should be enabled on all meetings.
- The option to provide the password with the meeting link should be disabled.
- *Anyone with the password can enter the meeting. So remember, this does not mean your meeting is completely secure. Participants can still share password. Please make sure to Enable a Waiting Room.
Keep Personal Meeting ID Private
- When scheduling class meetings, do not use your Personal Meeting ID (PMI).
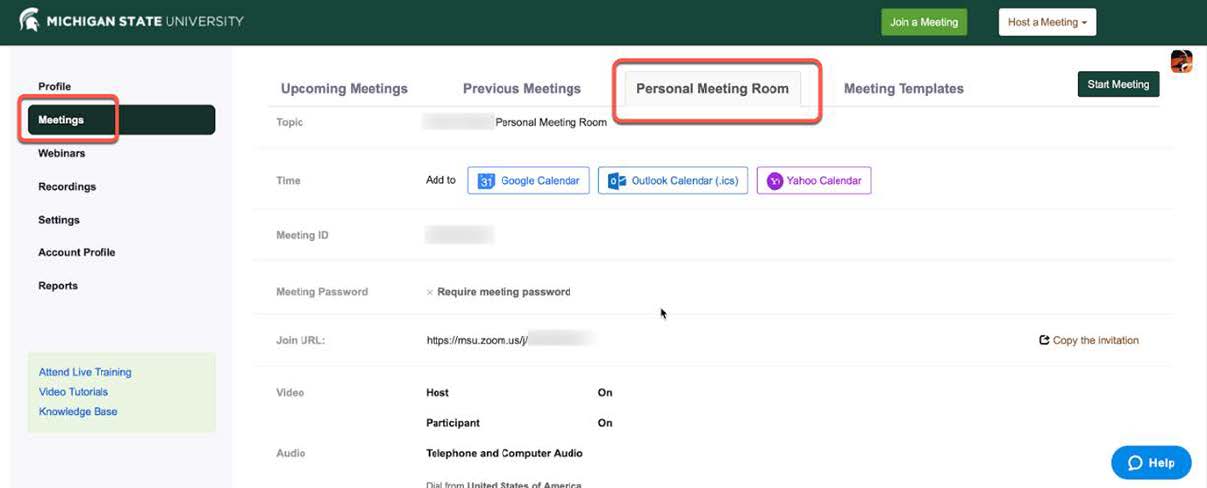
- To view and change your PMI and password go to Meetings in the left hand menu.
- Then click the Personal Meeting Room tab.
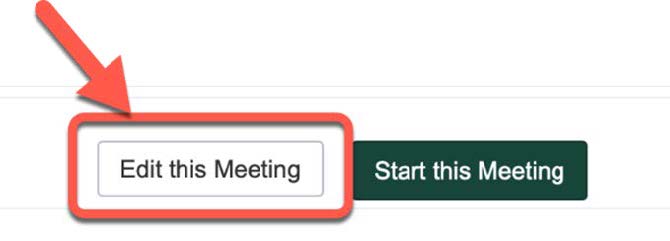
- To change your PMI click the Edit this Meeting button in the lower right.
- Now you will be able to edit your PMI and the password used to access these meetings.

Only Allow Authenticated Participants
- By default, only users logged in with a msu.edu email address can join meetings.

- If you need to allow users from outside of the institution, you can add the domain (ie. gmail.com) by clicking Edit. Please remember to delete the additional domains when not needed.
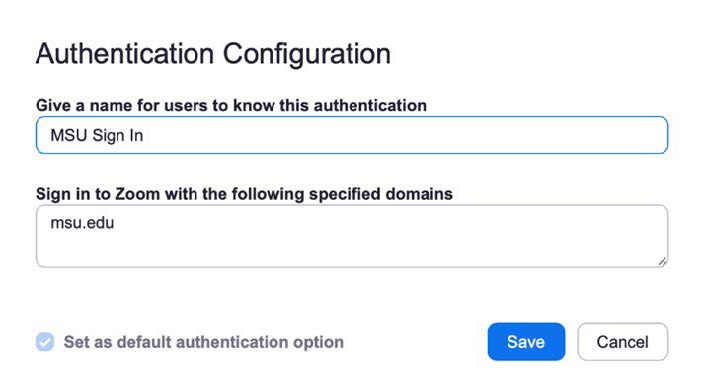
Mute Participants Upon Entry
- Just like the classroom space, it is best to not interrupt class that is already in session.

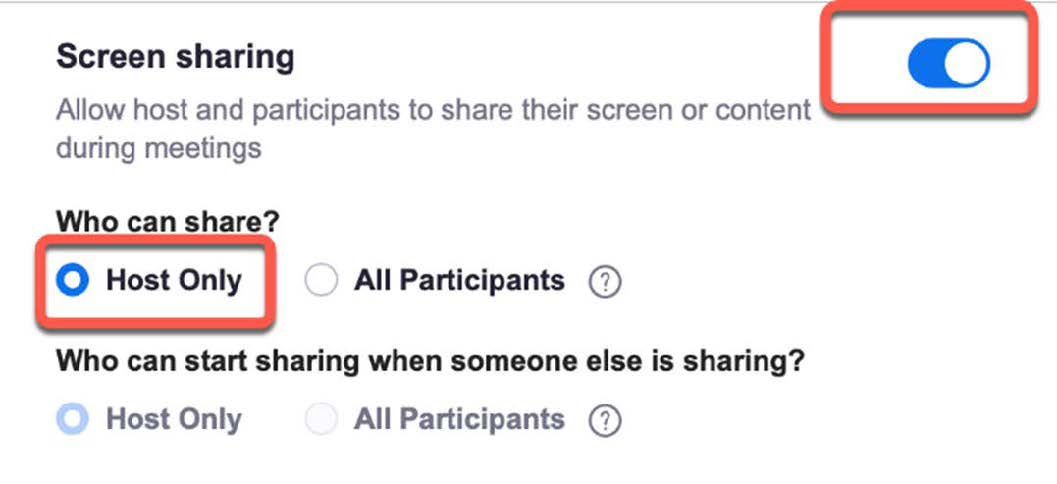
Disable Participants Screen Sharing
- Enable the Screen sharing feature by clicking on the button on the right.
- Make sure that Host Only is selected.
- Participants can be upgraded during the meeting in order to allow screen sharing on a case by case basis.
Chat
- Depending on the design of your class, the most secure option is to disable the chat feature altogether.
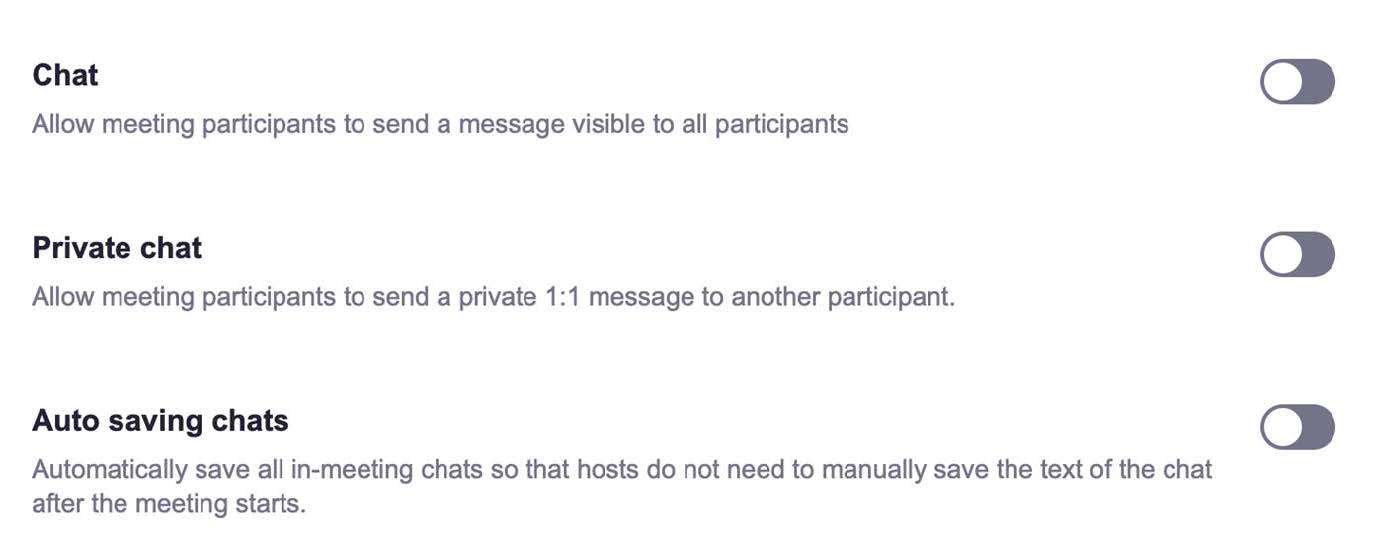
- However, if the chat function is a core component of your course, it is recommended that the participant-to-participant chat feature still be disabled and the option to prevent students from downloading the chat selected. A host can send out a copy of the chat if needed after the meeting.

Disable File Transfer
- This is not enabled by default, but it is a good idea to make sure this is not turned on.

Hide Telephone Numbers
- This is important in case a participant needs to call in using a personal phone number.
- The option is found in the Settings under the Telephone tab.

- Scroll down to the Mask phone number in participant list option.

Enable Virtual Backgrounds
- Because participants are engaging in meetings from their personal homes, it is a good idea to enable the virtual background for anyone who does not wish to reveal information about their personal space.

This work by CAL Academic Technology is licensed under a Creative Commons Attribution-NonCommercial 4.0 International License.

